This article explains how to install the Drone server for Bitbucket Cloud. The server is packaged as a minimal Docker image distributed on DockerHub.
Preparation
Provision an Instance
The Drone server should be installed on a server or virtual machine (using your cloud provider of choice) with standard http and https ports open. The instance must be publicly accessible by domain name or IP address to receive inbound webhooks from Bitbucket.
When installing the Drone server on your laptop for testing purposes, we recommend using a service like ngrok to provide your Drone server with a publicly accessible domain name.
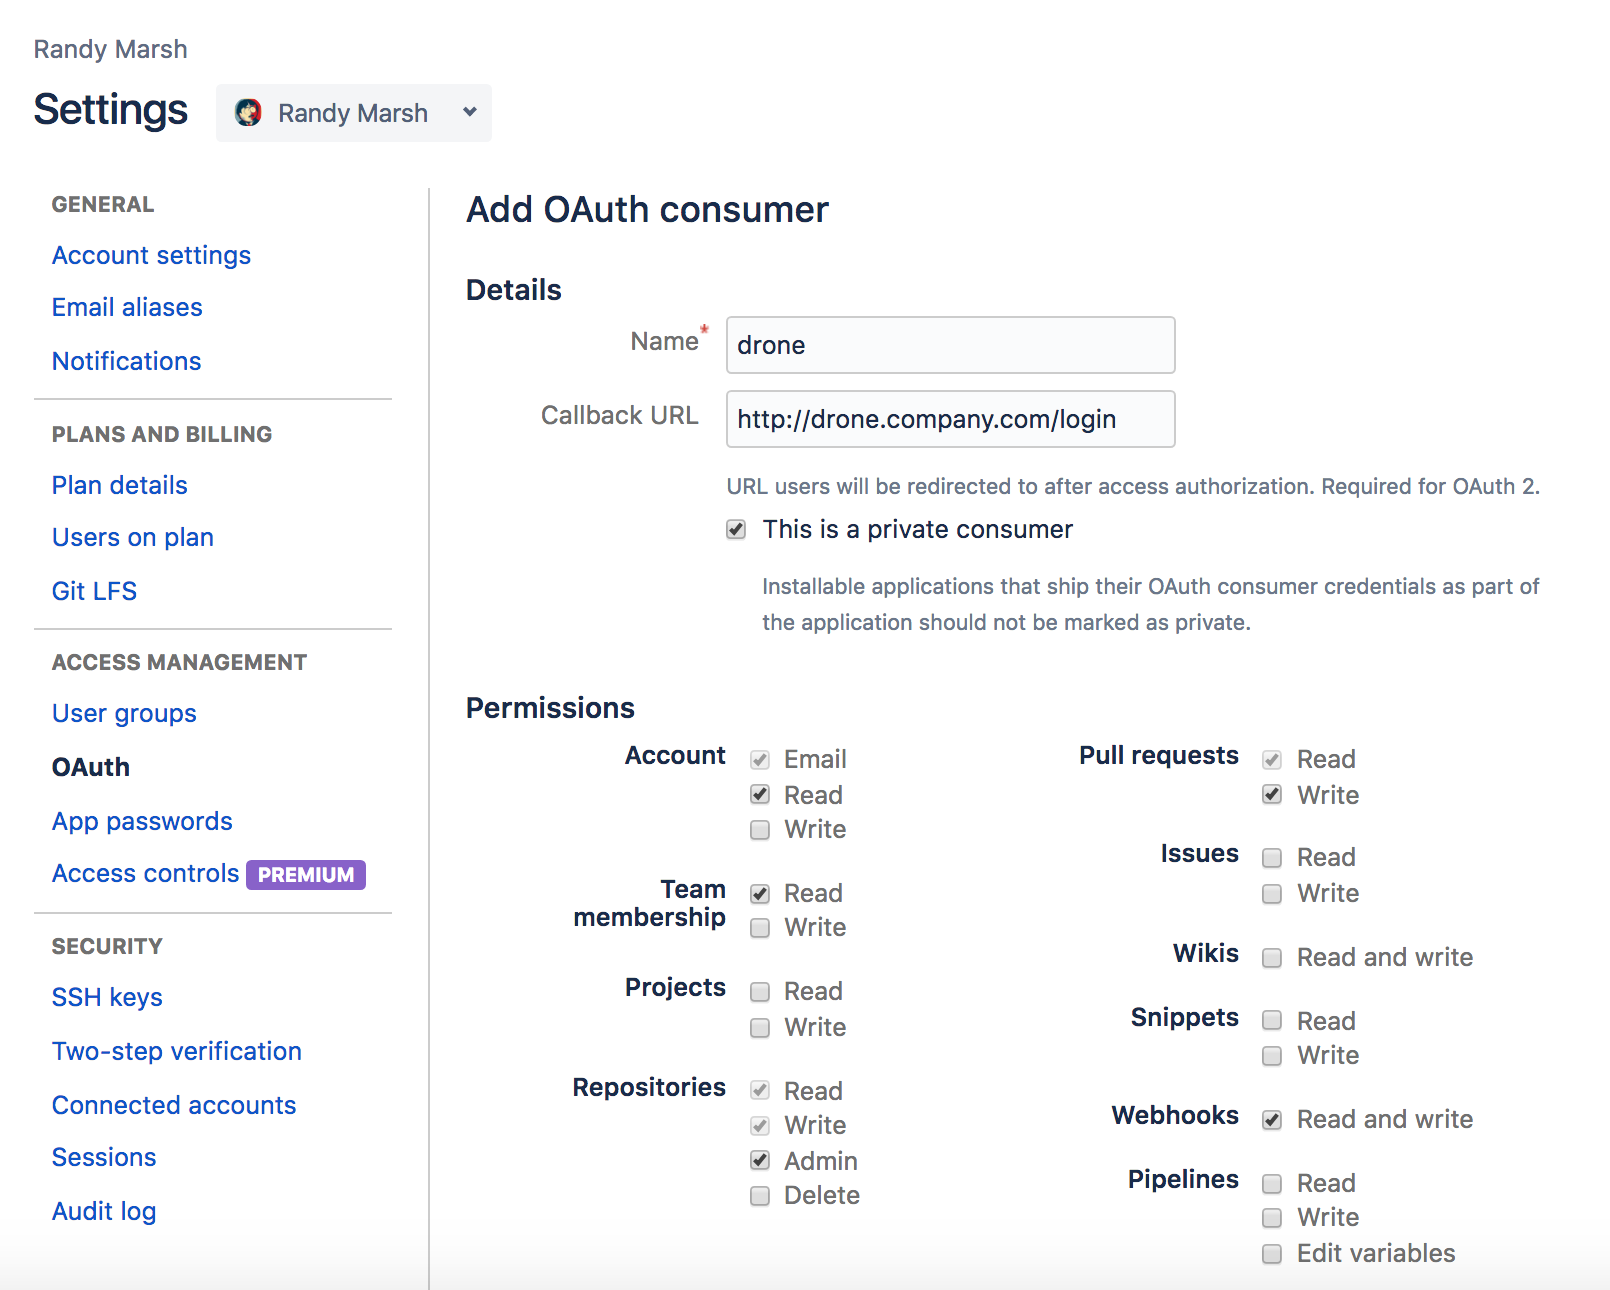
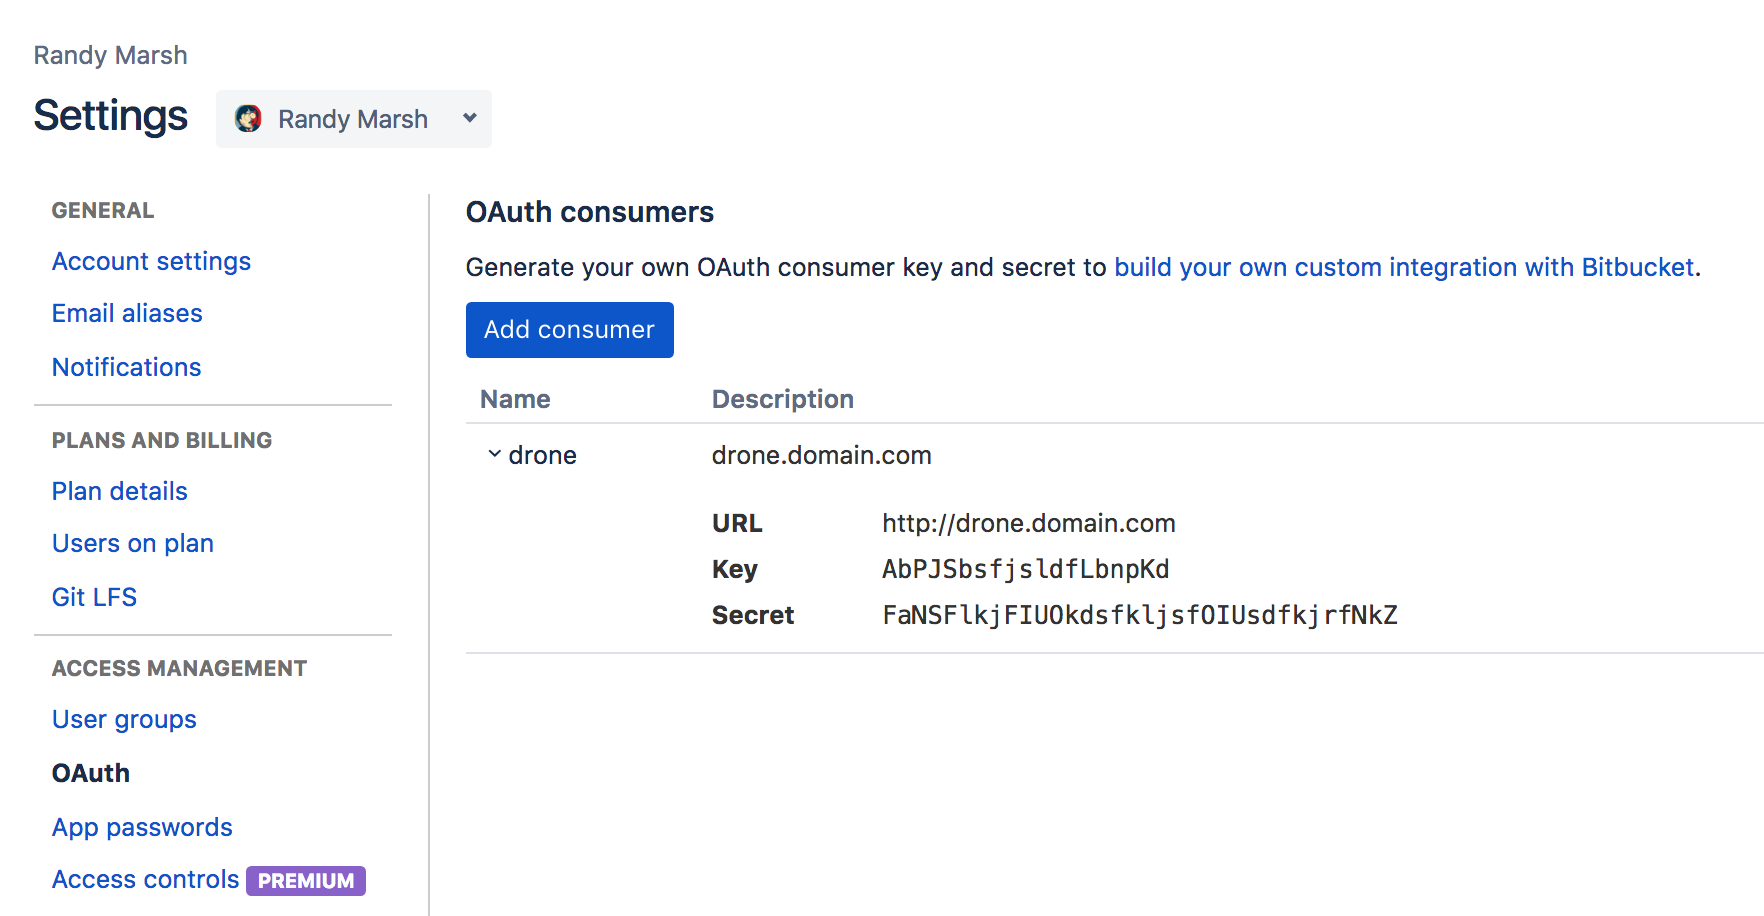
Create an OAuth Application
Create a Bitbucket OAuth application. The Consumer Key and Consumer Secret are used to authorize access to Bitbucket resources.
Create a Shared Secret
Create a shared secret to authenticate communication between runners and your central Drone server.
You can use openssl to generate a shared secret:
$ openssl rand -hex 16
bea26a2221fd8090ea38720fc445eca6
Enabling two-factor authentication?
The following path must be added to the context whitelist:
'/plugins/servlet/applinks/whoami'
Example:

Download
The Drone server is distributed as a lightweight Docker image. The image is self-contained and does not have any external dependencies. The latest tag will ensure the latest version of Drone.
$ docker pull drone/drone:2
Configuration
The Drone server is configured using environment variables. This article references a subset of configuration options, defined below. See Configuration for a complete list of configuration options.
-
- DRONE_BITBUCKET_CLIENT_ID
- Required string value provides your Bitbucket oauth Client ID.
-
- DRONE_BITBUCKET_CLIENT_SECRET
- Required string value provides your Bitbucket oauth Client Secret.
-
- DRONE_RPC_SECRET
- Required string value provides the shared secret generated in the previous step. This is used to authenticate the rpc connection between the server and runners. The server and runner must be provided the same secret value.
-
- DRONE_SERVER_HOST
- Required string value provides your external hostname or IP address. If using an IP address you may include the port. For example
drone.company.com.
-
- DRONE_SERVER_PROTO
- Required string value provides your external protocol scheme. This value should be set to http or https. This field defaults to https if you configure ssl or acme.
Start the Server
The server container can be started with the below command. The container is configured through environment variables. Remember to replace the placeholder values below with the appropriate values.
|
|
Install Runners
Once your server is up and running you will need to install runners to execute your build pipelines. See our runner installation documentation for detailed installation instructions.
Install Runners